

Deploying a GraphQL API to Lambda with Serverless Framework, Apollo and TypeScript


There are a lot of ways of developing the backend of an application. Here I will be mainly talking about how to setup a Lambda based Apollo GraphQL API.
In the end I will also talk about some alternative solutions, so you can choose the one that fits best for you.
here is the final sample code: github.com/perfectbase/serverless-graphql
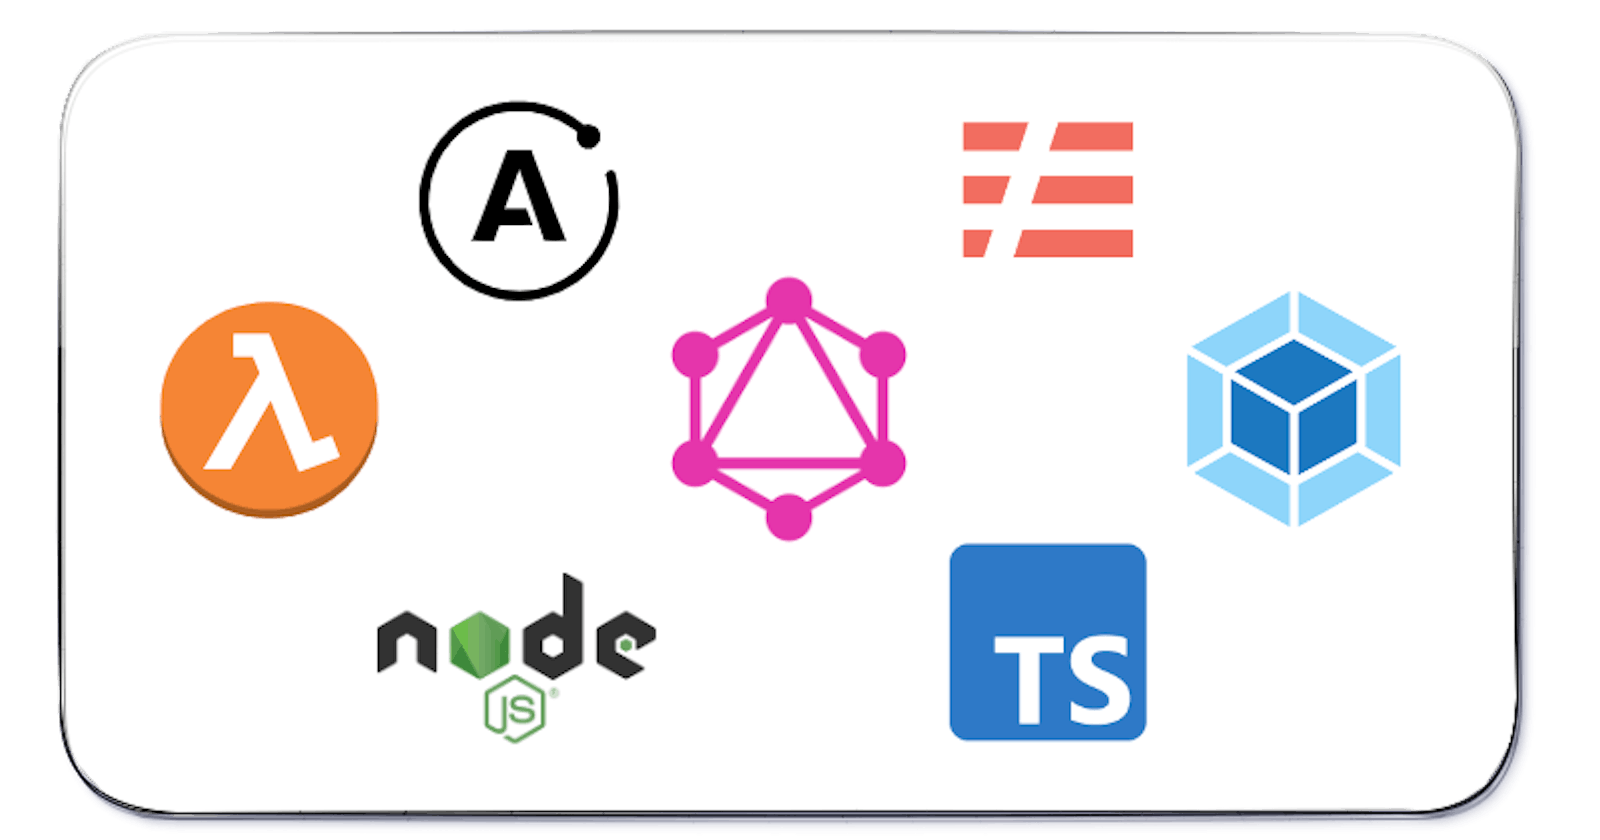
Stack
Serverless Framework
Webpack
TypeScript
Apollo
Some nice features
TypeScript
A strongly typed language helps you prevent writing buggy code and it becomes a lot easier to refactor when you need to.
If you are using some javascript framework, chances are that you are already using TypeScript in your frontend. Using the same language in the backend can help you keep productive, while changing from backend to frontend development
Run Locally with a fast Hot Reload (No server restart)
- Nowadays it's kind of unthinkable to have a development environment where you cant run the code locally, or that you need to wait a build task so that you can test your code. Nodemon has helped us with that for a long time, but a server restart also takes some seconds that can be annoying. By using serverless-offline you will have an almost instant hot reload, so you can modify your code and test it without breaking your thinking process.
-
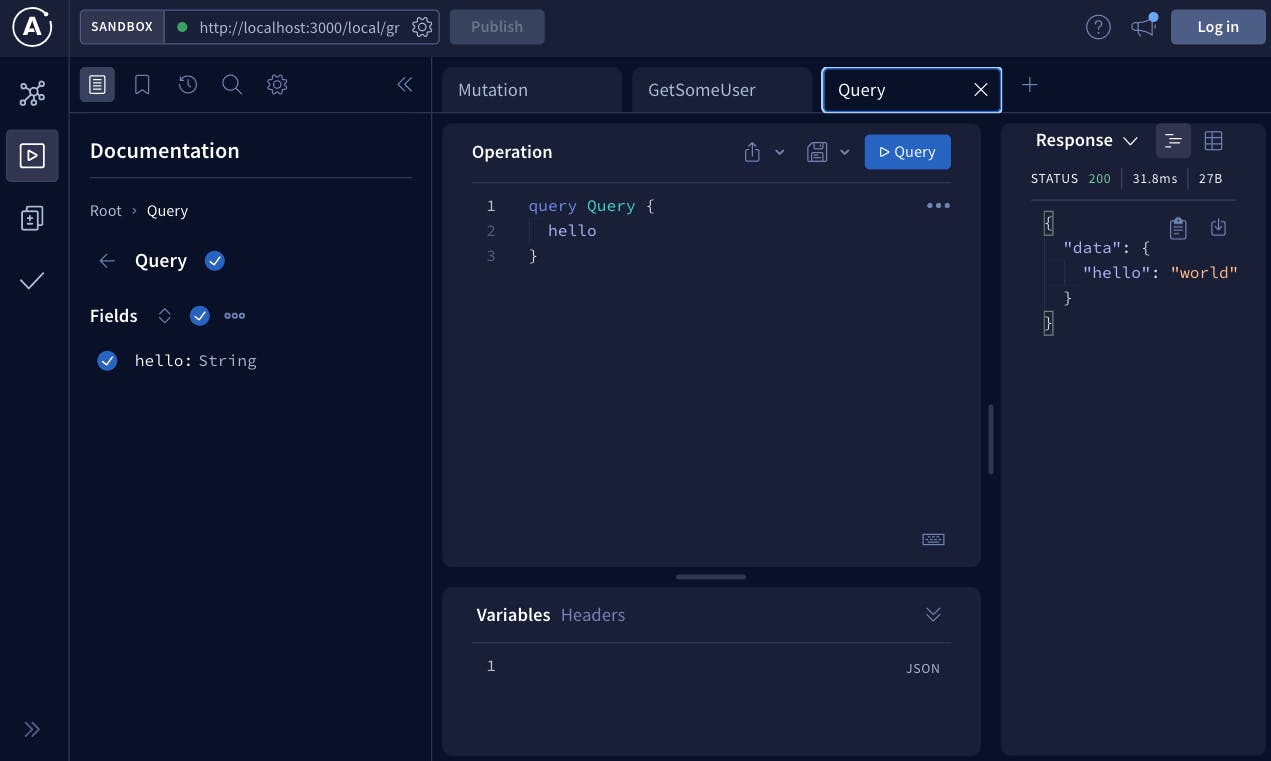
- Now with apollo 3, we have a different graphql playground. I love how Apollo made it easy to build the Queries and test the GraphQL API's.
Cheap pricing with serverless
- The serverless pricing model allows you to pay just for what you use. During development, the price will probably never leave the free tier.
Folder Structure
Here is how the final folder structure is going to look like:
sls-graphql/
├─ src/
│  ├─ functions/
│  │  ├─ graphql/
│  │  │  ├─ index.ts
│  │  │  ├─ handler.ts
│  ├─ lib/
│  │  ├─ helpers/
│  │  │  ├─ lambdaHelper.ts
├─ .babelrc
├─ .env
├─ .gitignore
├─ package-lock.json
├─ package.json
├─ serverless.ts
├─ tsconfig.json
├─ tsconfig.paths.json
├─ webpack.config.js
Setup TypeScript
First, lets start the node project by running the following command:
npm init -y
this will create a package.json file with the default configurations.
Now lets install some TypeScript related packages.
npm i -D typescript tsconfig-paths @types/node
Then we will create 2 files: tsconfig.json and tsconfig.paths.json
Here is how mine look like.
// tsconfig.paths.json
{
  "compilerOptions": {
    "baseUrl": ".",
    "paths": {
      "@functions/*": [
        "src/functions/*"
      ],
      "@libs/*": [
        "src/libs/*"
      ]
    }
  }
}
// tsconfig.json
{
  "extends": "./tsconfig.paths.json",
  "compilerOptions": {
    "moduleResolution": "node",
    "strict": true,
    "noUnusedLocals": true,
    "noUnusedParameters": true,
    "noImplicitAny": true,
    "noImplicitReturns": true,
    "esModuleInterop": true,
    "removeComments": true,
    "sourceMap": true,
    "lib": [
      "esnext"
    ],
    "module": "commonjs",
    "target": "es2022",
  },
  "include": [
    "src/**/*.ts",
    "serverless.ts"
  ],
  "ts-node": {
    "require": [
      "tsconfig-paths/register"
    ]
  }
}
The tsconfig.paths.json will allow us to import packages by using:import something from '@libs/helpers/...'
instead of:import something from '../../helpers/...'
※ If you are using VSCode, you might want to change your workspace settings, so that the editor recognizes the installed TypeScript version, instead of the default version bundled with the IDE. for that, just add the following configuration to your workspace settings json file:
"typescript.tsdk": "node_modules\\typescript\\lib"
Setup Serverless Framework
For the serverless framework setup, we will need the following packages:
npm i -D @serverless/typescript serverless serverless-offline serverless-webpack
Did you know we can create the Serverless Framework configuration with a .ts file instead of a .yml file? With this you get all the auto completion and type checking functionality!
Here is how my serverless.ts looks like:
// serverless.ts
import type { AWS } from '@serverless/typescript';
import graphql from '@functions/graphql';

const serverlessConfiguration: AWS = {
  service: 'sls',
  frameworkVersion: '3',
  useDotenv: true,
  package: {
    individually: true,
  },
  custom: {
    stage: '${opt:stage, "local"}',
    config: {
      local: {
        NODE_ENV: 'development',
      },
    },
    region: '${env:AWS_REGION}',
    webpack: {
      webpackConfig: './webpack.config.js',
      includeModules: {
        // You can delete this setting if you dont use aws-sdk.
        // If you use it, this setting will exclude it from the bundle,
        // since its included inside the lambda by default
        forceExclude: 'aws-sdk',
      },
    },
  },
  plugins: ['serverless-webpack', 'serverless-offline'],
  provider: {
    name: 'aws',
    region: '${self:custom.region}' as any,
    runtime: 'nodejs14.x',
    apiGateway: {
      minimumCompressionSize: 1024,
      shouldStartNameWithService: true,
    },
    environment: {
      AWS_NODEJS_CONNECTION_REUSE_ENABLED: '1',
      NODE_ENV:
        '${self:custom.config.${self:custom.stage}.NODE_ENV, "production"}',
      ENV: '${self:custom.stage}',
      REGION: '${self:custom.region}',
    },
    lambdaHashingVersion: '20201221',
  },
  functions: {
    graphql,
  },
};

module.exports = serverlessConfiguration;
You will also need a .env file for when you are ready to deploy the api to your aws account.
AWS_PROFILE=default
AWS_REGION=us-east-1
※ For deployment you will need to have your aws cli installed and configured: docs.aws.amazon.com/cli/latest/userguide/cl..
Setup Webpack
Here is what we need to install for the Webpack setup:
npm i -D webpack webpack-node-externals @types/webpack-node-externals tsconfig-paths-webpack-plugin fork-ts-checker-webpack-plugin babel-loader @babel/core @babel/preset-env @babel/preset-typescript
We need a .babelrc file so that our TypeScript code can by transpiled.
// .babelrc
{
  "presets": [
    [
      "@babel/preset-env",
      {
        "targets": {
          "node": "14"
        }
      }
    ],
    [
      "@babel/preset-typescript"
    ]
  ]
}
Now we can add the webpack configuration:
// webpack.config.js
const path = require('path');
const slsw = require('serverless-webpack');
const nodeExternals = require('webpack-node-externals');
const ForkTsCheckerWebpackPlugin = require('fork-ts-checker-webpack-plugin');
const TsconfigPathsPlugin = require('tsconfig-paths-webpack-plugin');

module.exports = {
  context: __dirname,
  mode: slsw.lib.webpack.isLocal ? 'development' : 'production',
  entry: slsw.lib.entries,
  devtool: 'source-map',
  target: 'node',
  externals: [nodeExternals()],
  resolve: {
    extensions: ['.js', '.jsx', '.json', '.ts', '.tsx'],
    plugins: [
      new TsconfigPathsPlugin({
        configFile: './tsconfig.paths.json',
      }),
    ],
  },
  output: {
    libraryTarget: 'commonjs2',
    path: path.join(__dirname, '.webpack'),
    filename: '[name].js',
  },
  module: {
    rules: [
      {
        // Include ts, tsx, js, and jsx files.
        test: /\.(ts|js)x?$/,
        exclude: [/node_modules/, /\.serverless/, /\.webpack/],
        use: ['babel-loader'],
      },
    ],
  },
  plugins: [
    new ForkTsCheckerWebpackPlugin(),
  ],
};
Setup Apollo
Now that we have all the structure ready, we just need to implement the api.
For this we will need these packages:
npm i apollo-server-lambda express source-map-support
Finally we can create the api functions:
// src/functions/graphql/handler.ts
// This file is the actual GraphQL API logic
import express from 'express';
import { ApolloServer, gql } from 'apollo-server-lambda';
import { IncomingMessage, OutgoingMessage } from 'http';

const typeDefs = gql`
  type Query {
    hello: String
  }
`;

const resolvers = {
  Query: {
    hello: () => 'world',
  },
};

const apolloServer = new ApolloServer({
  typeDefs,
  resolvers,
  csrfPrevention: true,
  context: ({ express }): Context => {
    return { req: express.req, res: express.res };
  },
});

export interface Context {
  req: IncomingMessage;
  res: OutgoingMessage;
}

export const main = apolloServer.createHandler({
  expressAppFromMiddleware(middleware) {
    const app = express();
    // Enable CORS for all methods
    app.use(function (_req, res, next) {
      res.header('Access-Control-Allow-Origin', '*');
      res.header(
        'Access-Control-Allow-Headers',
        'Origin, X-Requested-With, Content-Type, Accept'
      );
      next();
    });
    app.use(middleware);
    return app;
  },
});
// src/functions/graphql/index.ts
// This file is the lambda configuration for the api path
const handlerDir = `${__dirname
  .split(process.cwd())[1]
  .substring(1)
  .replace(/\\/g, '/')}`;

const slsFunc = {
  handler: `${handlerDir}/handler.main`,
  events: [
    {
      http: {
        method: 'get',
        path: 'graphql',
      },
    },
    {
      http: {
        method: 'post',
        path: 'graphql',
      },
    },
  ],
};

export default slsFunc;
Run and test the api
Now that we have our api, we can run it locally with the following command:
npx sls offline --stage local
You can check your api at: localhost:3000/local/graphql
You will probably want to add this command to the package.json so that you can run the server by using npm run dev.
My scripts config in the package.json looks like this:
// package.json
{
// ...
  "scripts": {
    "dev": "sls offline --stage local",
    "deploy:dev": "sls deploy --stage dev",
    "deploy:prd": "sls deploy --stage prd"
  },
// ...
}
※ If your IDE shows some errors, you might need to restart your window so that it picks up all the new configurations.
Next Steps
You are now ready to start adding functionality to your API!
I would recommend you to choose an ORM and a GraphQL library.
just some examples:
ORM
TypeORM
PRISMA
GraphQL
TypeGraphQL
Nexus
GraphQL Tools
Caveats
Might cost a little if you want to connect to an RDS instance.
- If you have an RDS instance, chances are that its is inside a private subnet. That means that if you want to connect your lambda to the RDS, you will need to put your lambda inside your VPC. If you want your lambda to have internet access from inside the VPC, you will need a NAT Gateway, that costs by the hour, and can be a little expensive for simple projects.
It can be a little complicated to setup Subscriptions.
- Lambdas are short lived cloud functions. That means that they don't work well with Websockets. If you want to use Subscriptions with your lambda GraphQL api, it is possible, but you will need some setup. You could use ApiGateway for websockets, and use Redis as a PubSub, for example. There are also some serverless subscription solutions that you might want to take a look. (e.g. graphql-lambda-subscriptions)
Alternatives
We all know by now that there is no solution that works best for every project. If the solution in this article does not fit your project, here are some alternatives to check out.
Amplify with AppSync
AWS has an out of the box serverless solution for GraphQL APIs.
Advantages
Works great with Cognito authentication and DynamoDB.
You can also have custom lambda resolvers.
Subscriptions works and its completely serverless.
Disadvantages
I didn't like the local development experience that much. Specially when using custom lambdas and running dynamodb locally on docker. It's been some time since I last tried it, maybe its better now.
If you are like me and likes to customize a lot of things, you will probably have a hard time here. (e.g. if you would like to have a Code first approach with TypeGraphQL)
Dockerized server to Fargate
This is probably the most customizable solution. If you choose this approach, you might want to look at some backend framework like NestJS.
Advantages
Its a docker environment, so you can customize it as you could do it with an old school server.
You can link AWS Secrets Manager with the container's environment variables, to increase security of secrets. (big companies require it a lot.)
Disadvantages
It's not serverless, so it will cost while it's running. (If you make the container small and setup auto scale, you can make it fairly cheap.)
If you want to make it scalable (running in multiple containers) you will have to think on how to setup subscriptions. (Maybe an external Redis as a PubSub?)
Example Code Repository
You might want to checkout some other configurations, like the .gitignore file and linter setup↓↓↓
github.com/perfectbase/serverless-graphql
Thanks for reading!
Follow me on Twitter: twitter.com/RaviCoding